To configure the white-label domain (so that the Admin platform will be integrated with your own website), go to the “White-label Domain” tab of the “Settings” module:
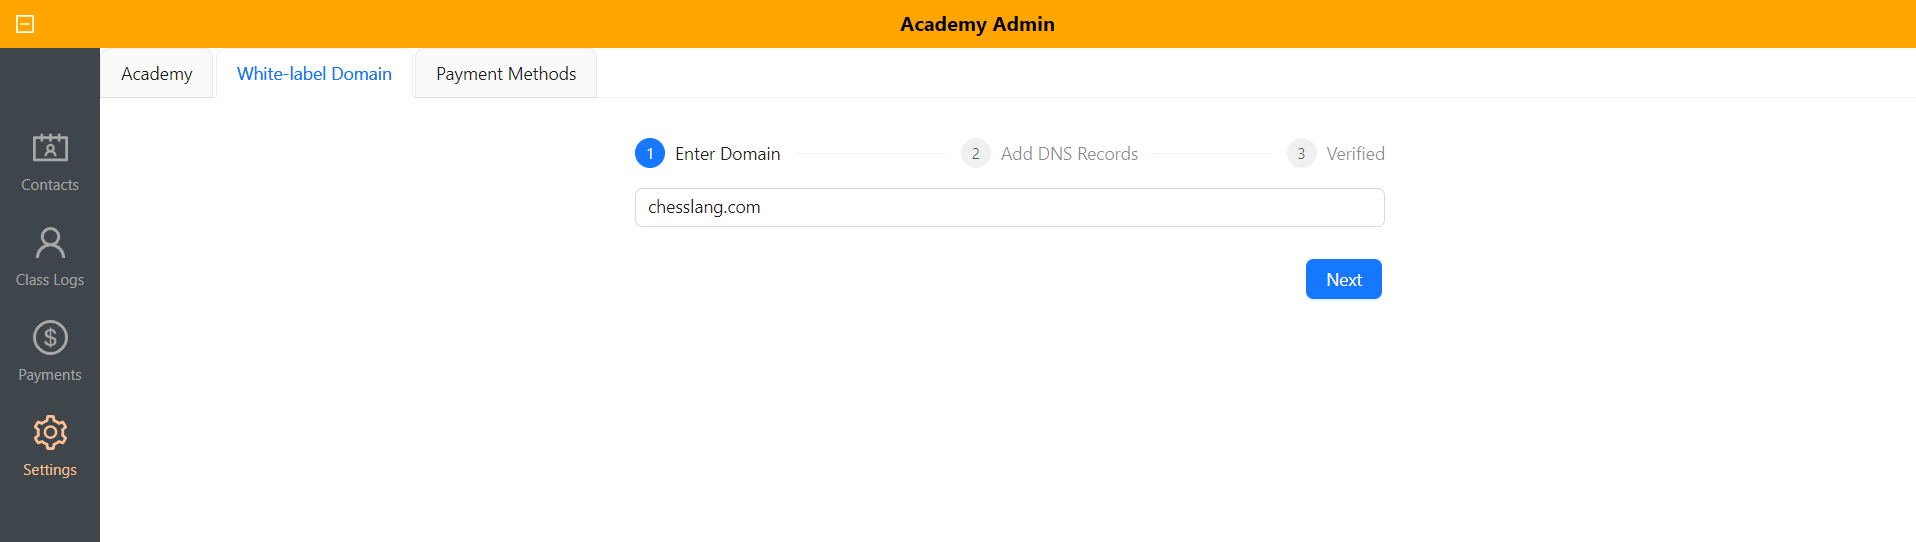
First, enter your domain in the following format: <DOMAIN-NAME>.<EXTENSION>. For example, chesslang.com. And then click “Next”:
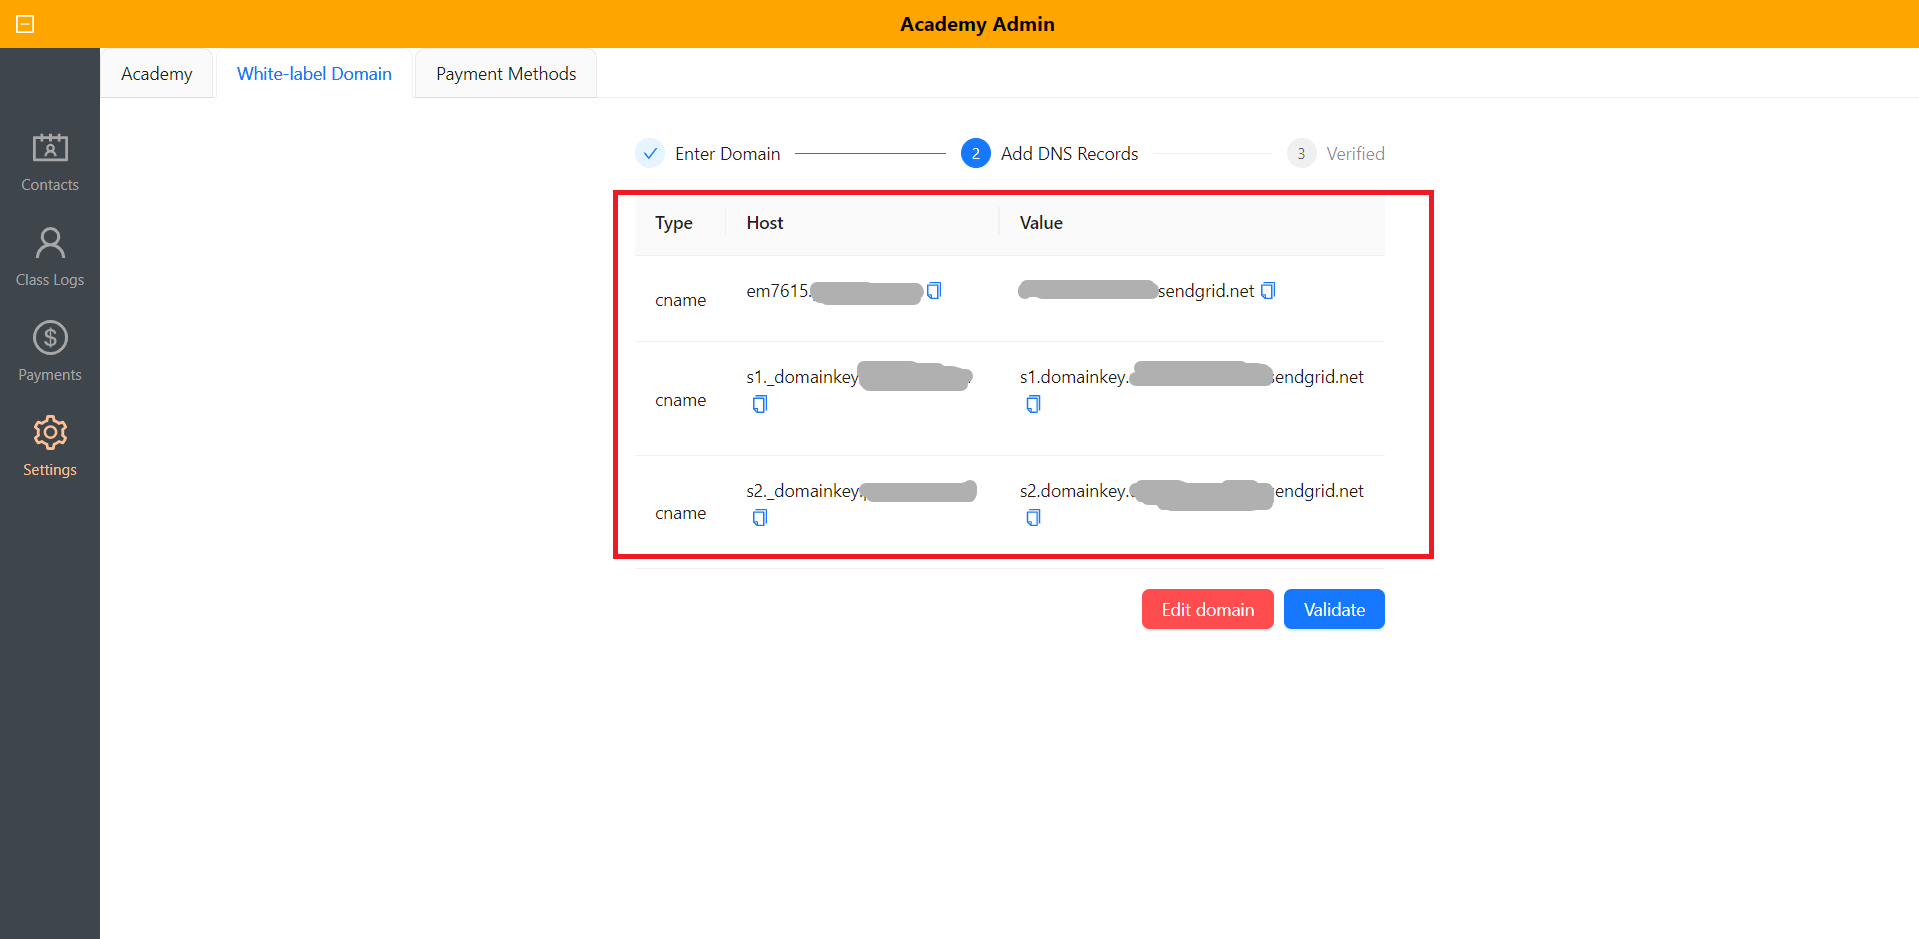
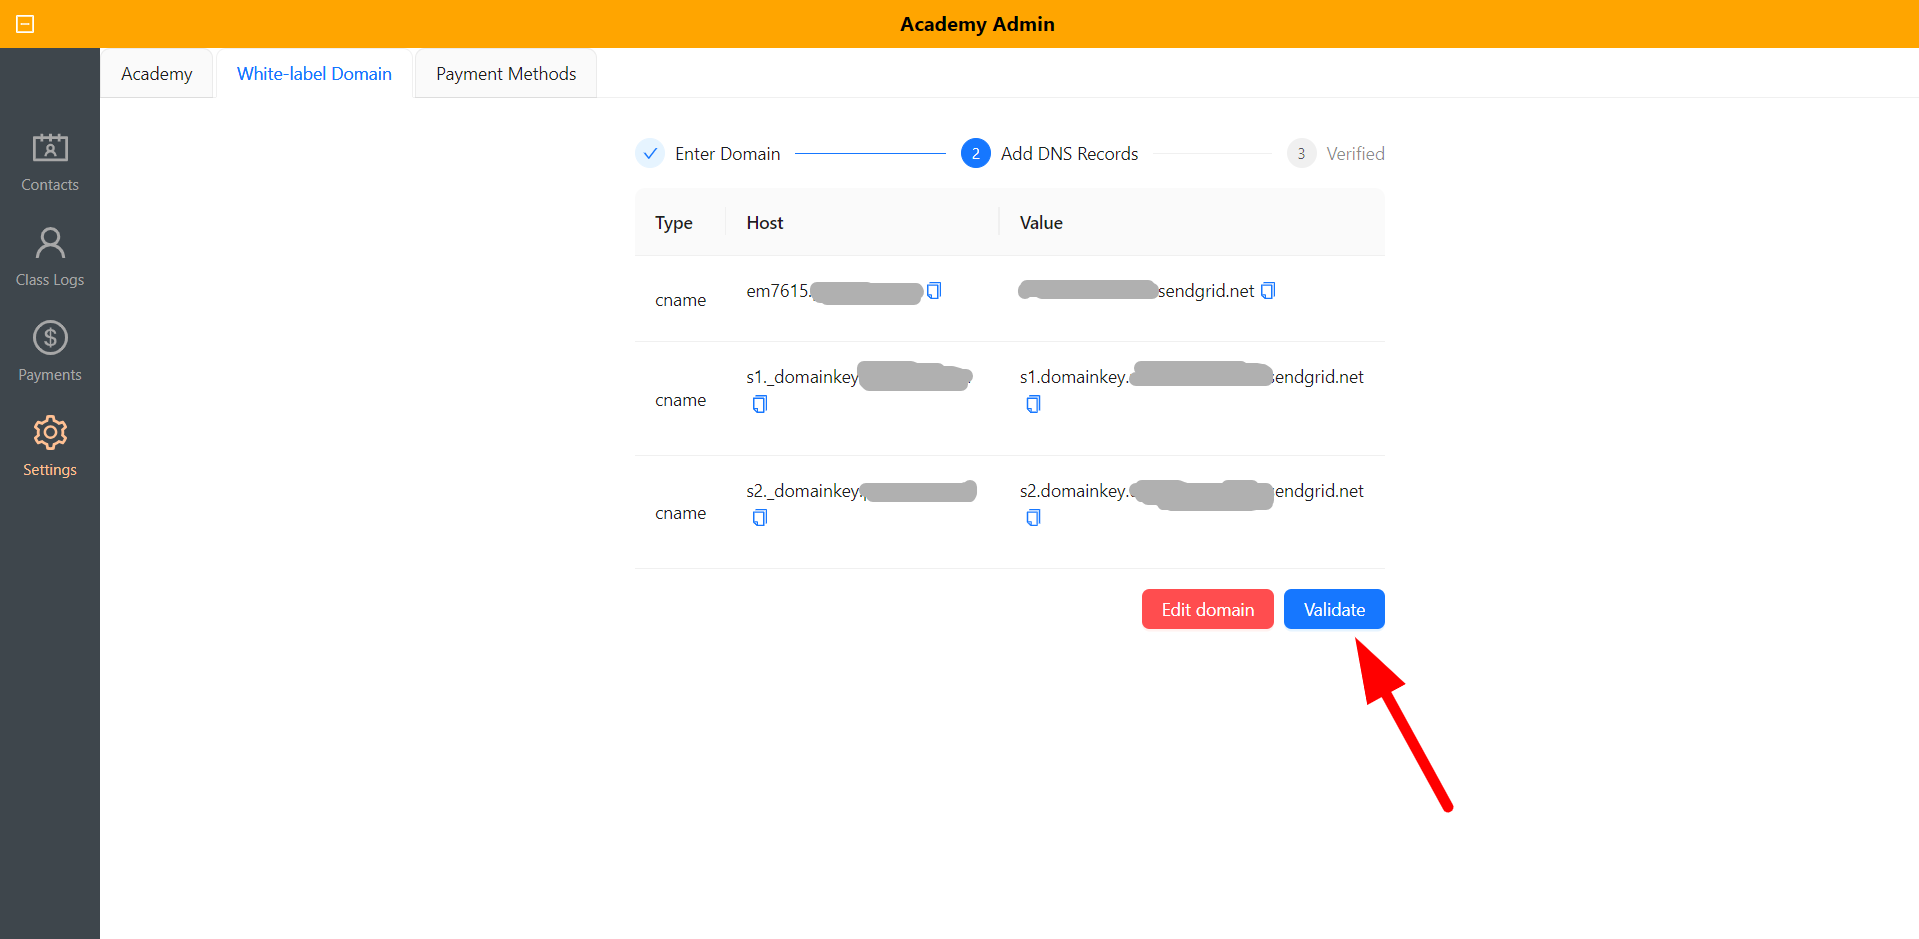
After that, you will get the DNS records of your website:
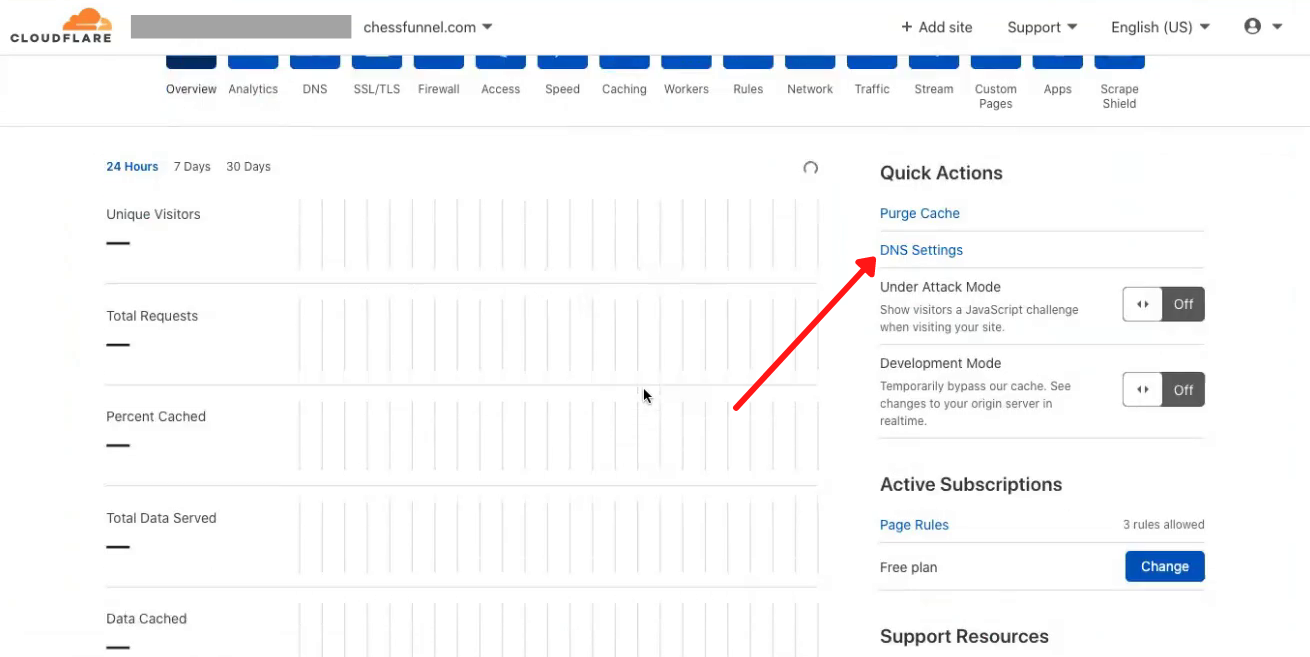
Now go to the site where your website is hosted, and go to “DNS Settings“:
Note: If your domain is hosted by us, please reach out to our support for adding DNS records.
Once you are in the DNS Settings page, click on the ‘Add record’ button to add your DNS records:
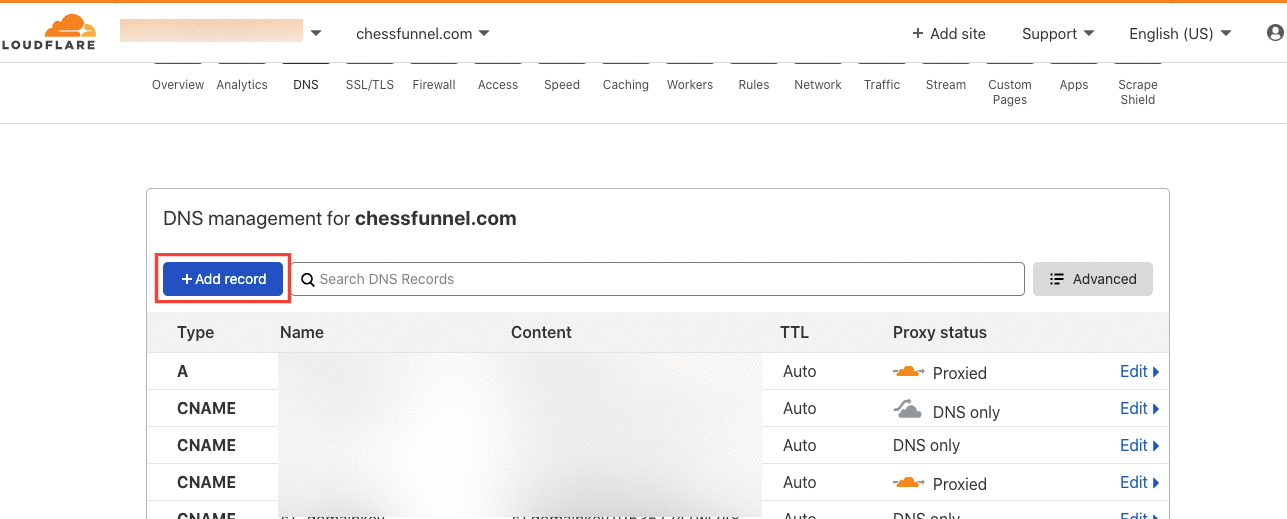
From the drop-down menu called ‘Type‘, choose “CNAME” record.
Now going back to the White-label domain settings in the Admin platform, you will see two columns ‘Host’ and ‘Value’. First, copy the contents in the ‘Host‘ column of the first row and paste it into the ‘Name’ field in the DNS Management page:
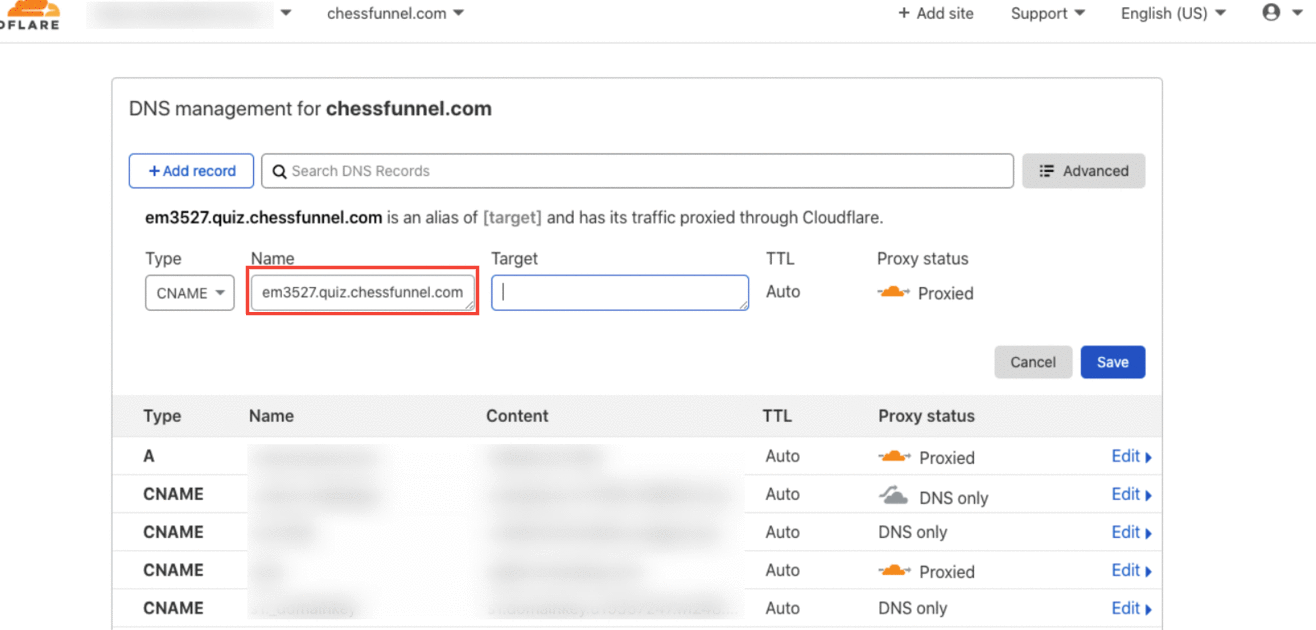
Now copy the contents in the ‘Value‘ column of the first row and paste it into the ‘Target‘ field in the DNS Management page:
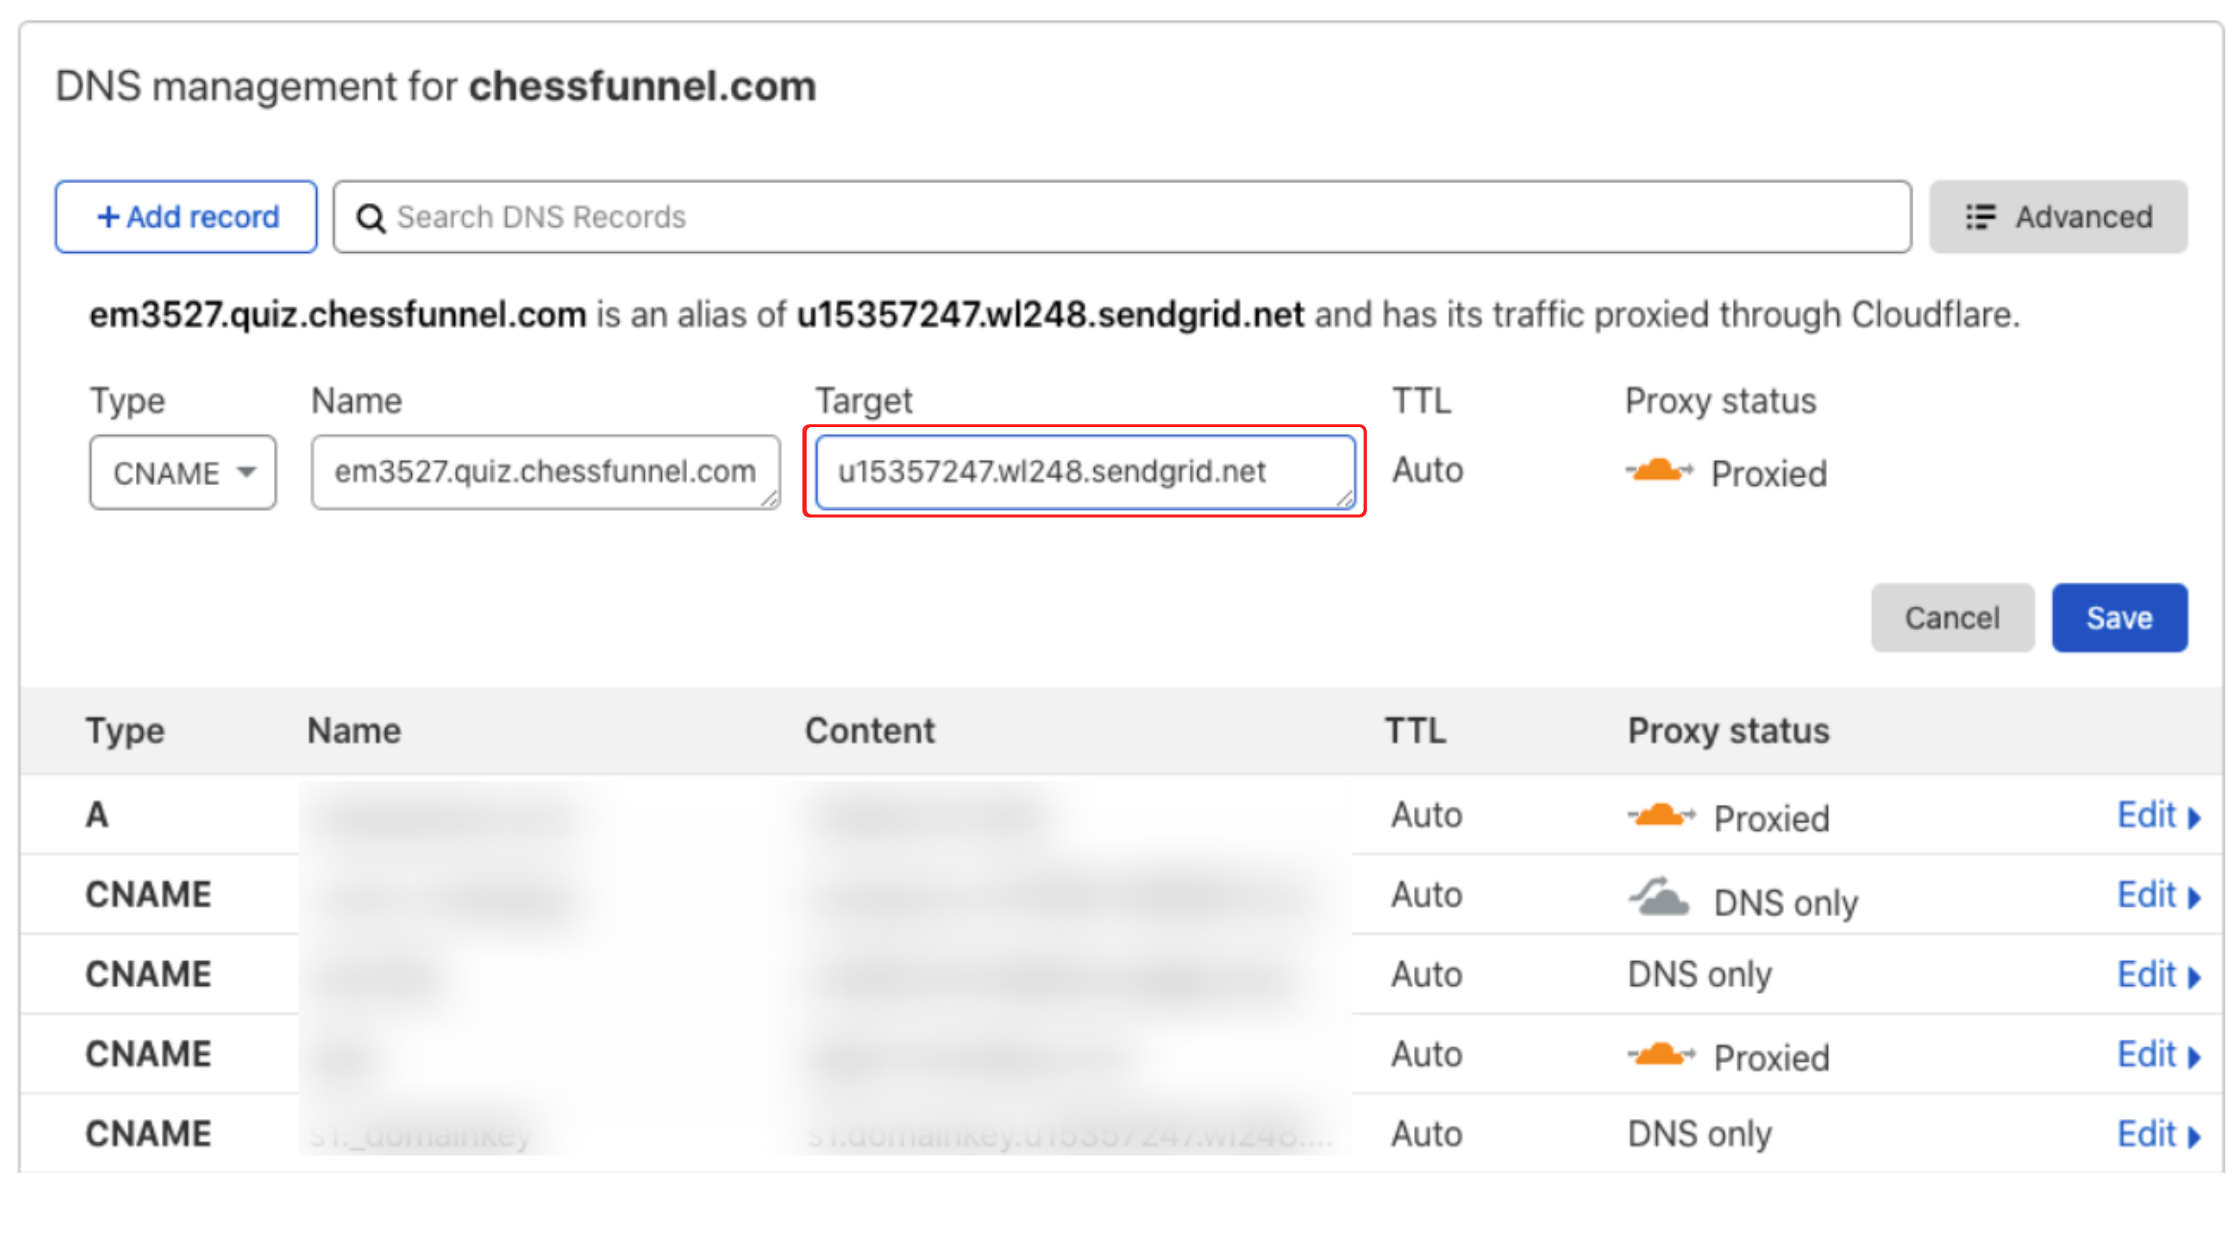
You may notice the proxy status is “Proxied“. Click on it to change it to ‘DNS Only’. Finally, click “Save“.
 Repeat this process for the other two rows of DNS records of CNAME type.
 The contents of ‘Host’ always go into the ‘Name’ field and the contents of ‘Value’ will go into the ‘Target’ field.
After adding all 3 DNS records, click the “Validate” button.
Please wait for sometime for it to get validated and verified.